

How to Add SSO Authentication to any Kubernetes Services

As an SRE, I’ve encountered many cloud-native applications that lack built-in support for SSO authentication. Just take Uptime Kuma, for example—or Atlantis, which doesn’t even require user authentication at all.
And even when basic authentication is available—like a simple username and password—it’s often insufficient for large-scale enterprise adoption, where centralized identity and access management is a must.
So, how do you approach this issue?
In this post, I’ll show you how to integrate SSO authentication in Kubernetes Services that don’t natively support it, with a hands-on example of securing Uptime Kuma via Kustomize, Keycloak and OAuth2 Proxy.
So why would you even need SSO Authentication?
Imagine running multiple applications across your enterprise, each with different Access-control list.
Some services may be restricted to specific teams, while others are accessible only to administrators or product managers.
Managing access controls on a per-service basis might seem manageable at first — but it quickly becomes problematic as the number of users grows, especially when people switch teams or join/leave the company, which is common in large organizations.
Just consider a scenario where an employee resigns: their access must be revoked immediately to prevent potential misuse. Doing this manually across multiple applications is error-prone and time-consuming.
Ideally, this should be handled with just a few clicks — and that level of efficiency is only possible with a centralized access management system.
That’s where Single Sign-On (SSO) comes in. SSO, backed by Identity Providers (IdPs), SSO lets you manage access to all your applications from one central component.
The following is a set of commonly used Identity Providers:
Okta — A cloud-based identity service that offers SSO, MFA, and user management for enterprise applications.
Microsoft Entra ID (formerly Azure AD) — Microsoft’s identity platform for managing users and securing access to Microsoft and third-party applications.
AWS Single Sign-On (formerly AWS SSO) — A centralized access management service for AWS accounts and cloud applications.
Keycloak — An open-source identity and access management solution that supports SSO, OAuth2, and federated identity providers.
For this post, we’ll be using Keycloak as the Identity Provider—but I won’t be covering its setup or configuration here.
But what if your Application doesn’t support SSO?
When I first encountered such applications, the first idea was to build custom authentication plugins for each service, integrating directly with an identity provider. But that’s time-consuming and demands extensive understanding of the app’s internals.
Not exactly a practical, right?
But the task itself is conceptually simple: when a user tries to access the service UI, they should be prompted to log in via SSO.
That’s where OAuth2 Proxy comes in.
OAuth2 Proxy acts as a gatekeeper in front of your application, redirecting users to authenticate via your identity provider before allowing access to the UI.
Since we want to deploy this application on Kubernetes, you have two main options:
Sidecar container – Deploy it alongside your service which makes it easier to manage, especially when replicating the setup across different environments.
Standalone deployment – Run it as a separate service shared among multiple applications which centralizes configuration but can introduce added complexity over time.
Given its small image size (~12.8 MB) and the overall portability of the setup (as discussed below), I find the sidecar pattern more practical.
Integration of OAuth2 Proxy and the Kubernetes Service
To integrate the OAuth2 Proxy with the (Kubernetes) Service, we’ll use Kustomize.
Kustomize lets us declaratively customize deployments without altering the original Helm chart—or plain Kubernetes manifests, if you prefer.
Nonetheless, this approach is ideal for this, as it allows you then to also reuse the same OAuth2 Proxy configuration across all the other services.
For this demo, the kustomization.yaml file looks like this:
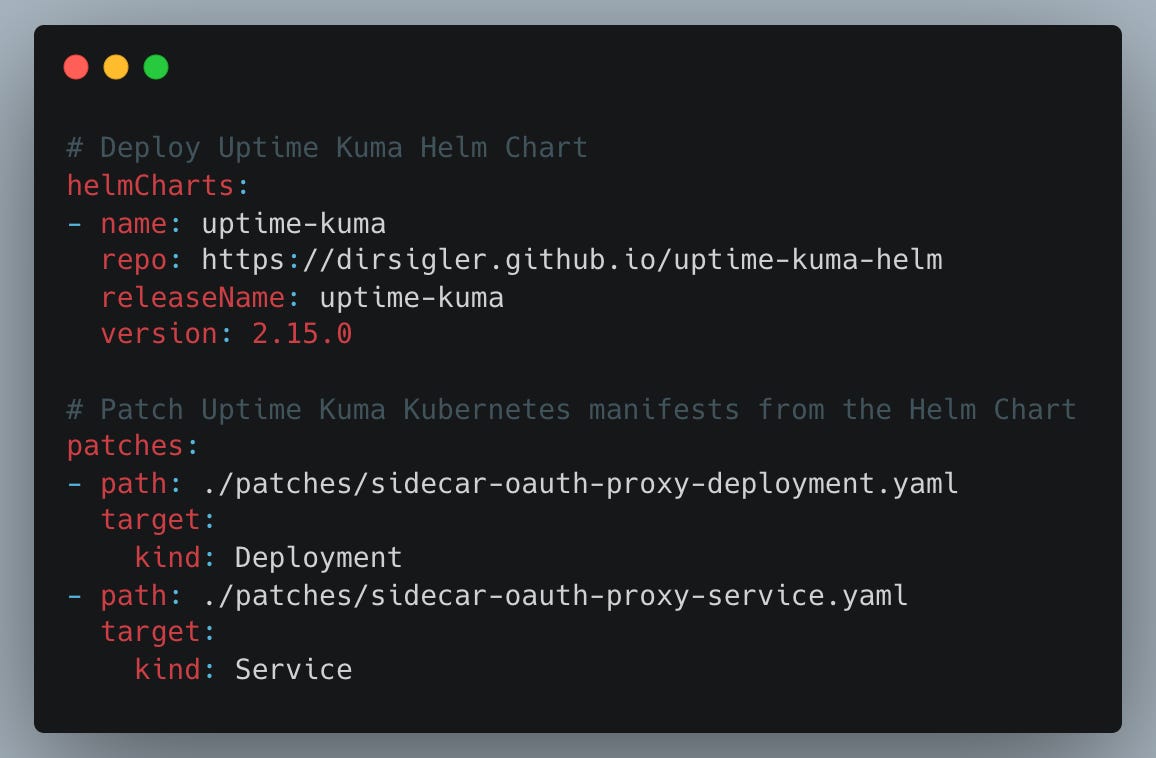
The helmCharts section isn’t particularly important here as it simply defines the Uptime Kuma Helm chart release to be included as a deployment resource.
What really matters is how we patch the Uptime Kuma deployment to integrate the OAuth2 Proxy as a sidecar container.
To better understand the changes, here’s the initial deployment—without the OAuth2 Proxy:

In short, the Helm chart (among other things) deploys a Kubernetes Service that routes traffic directly to the Uptime Kuma Pod.
However, the traffic should first be routed through the OAuth2 Proxy sidecar container, which handles authentication. Once authenticated, the sidecar then forwards the request to the Uptime Kuma Pod.
This behavior is configured using the patches parameter referenced in the kustomization.yaml file:
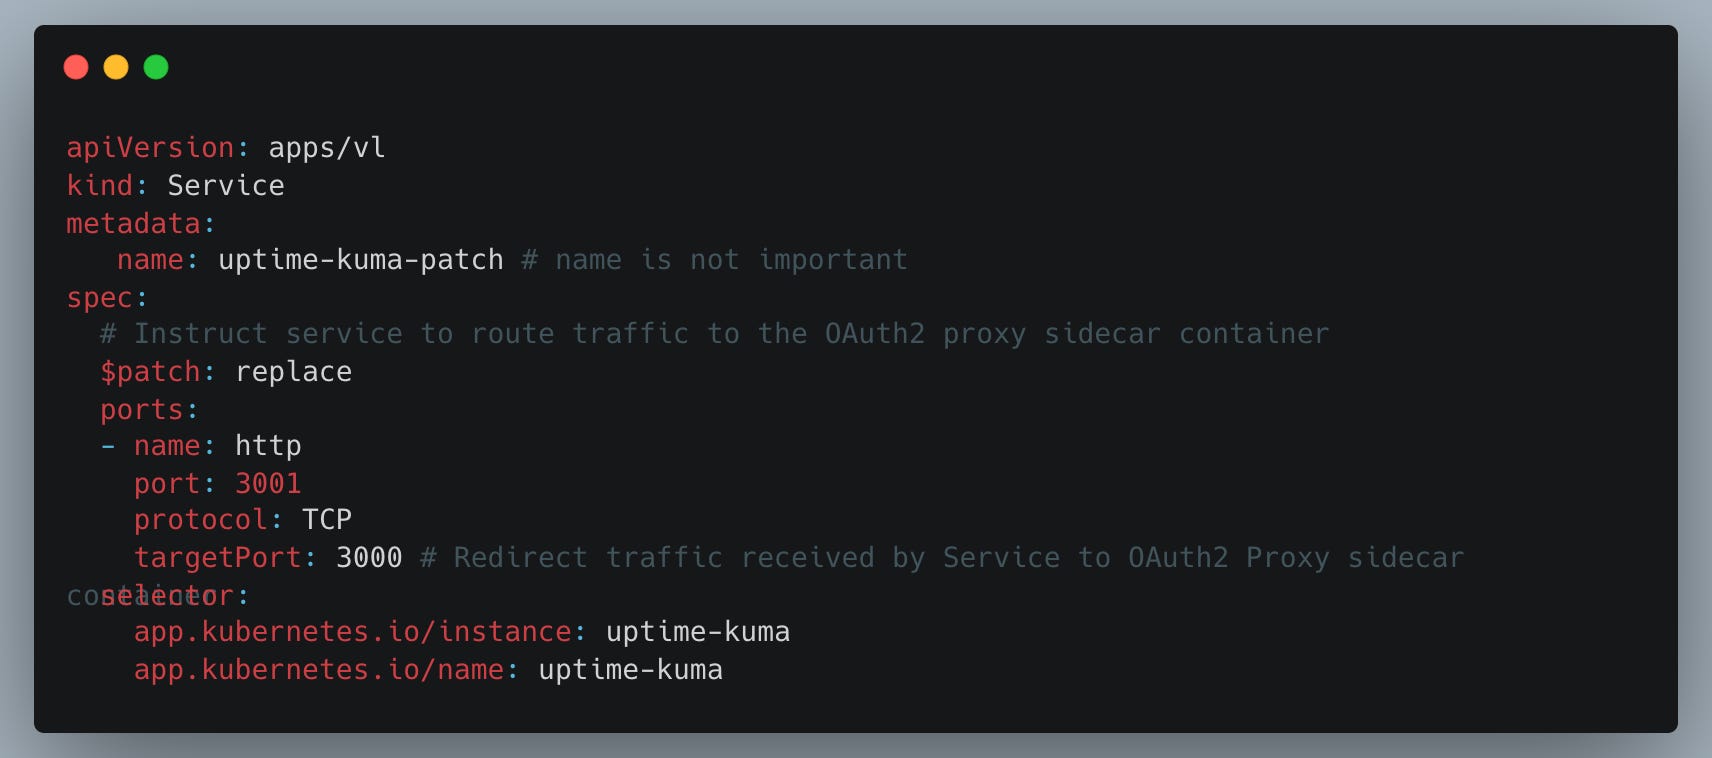
Uptime Kuma Service Patch:
Uptime Kuma Deployment patch:
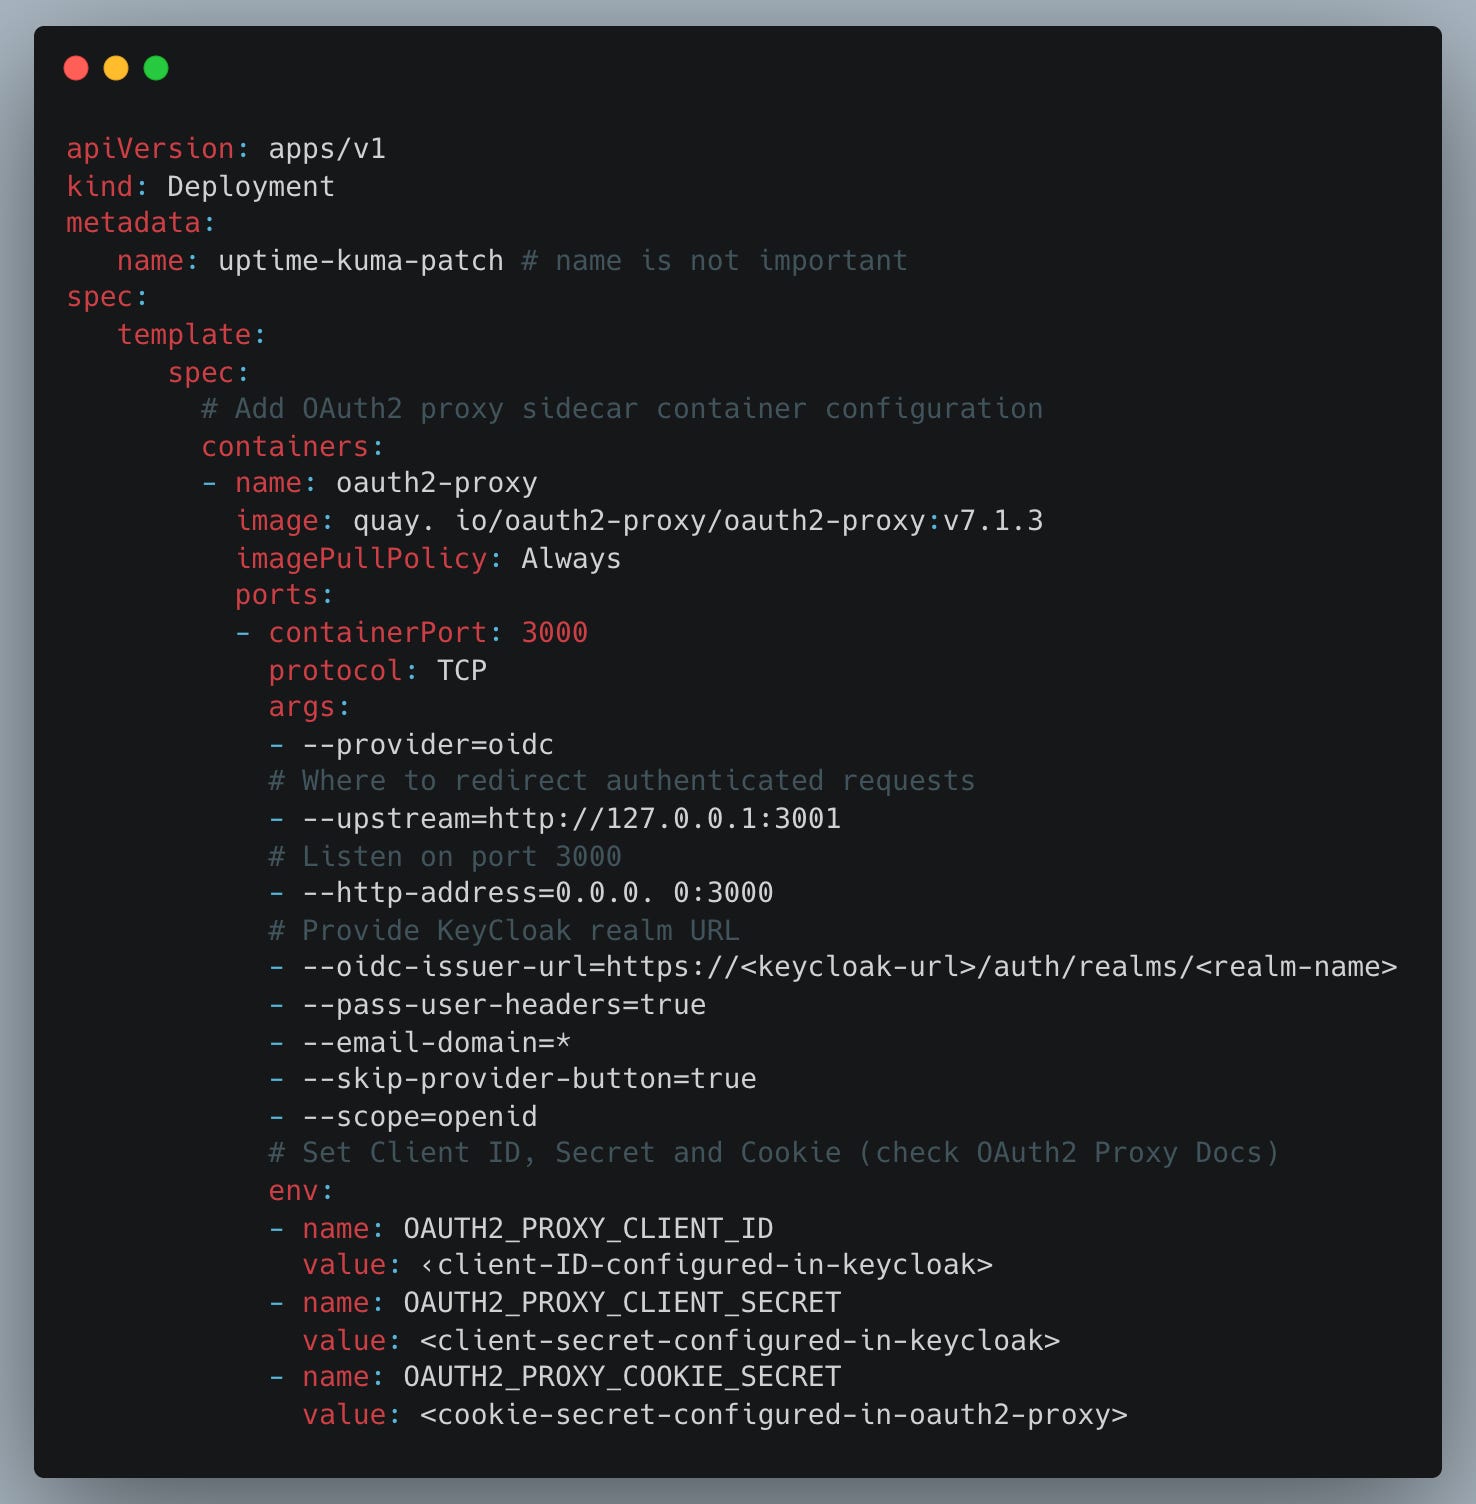
The code comments should provide sufficient explanation, and the end result is as follows:
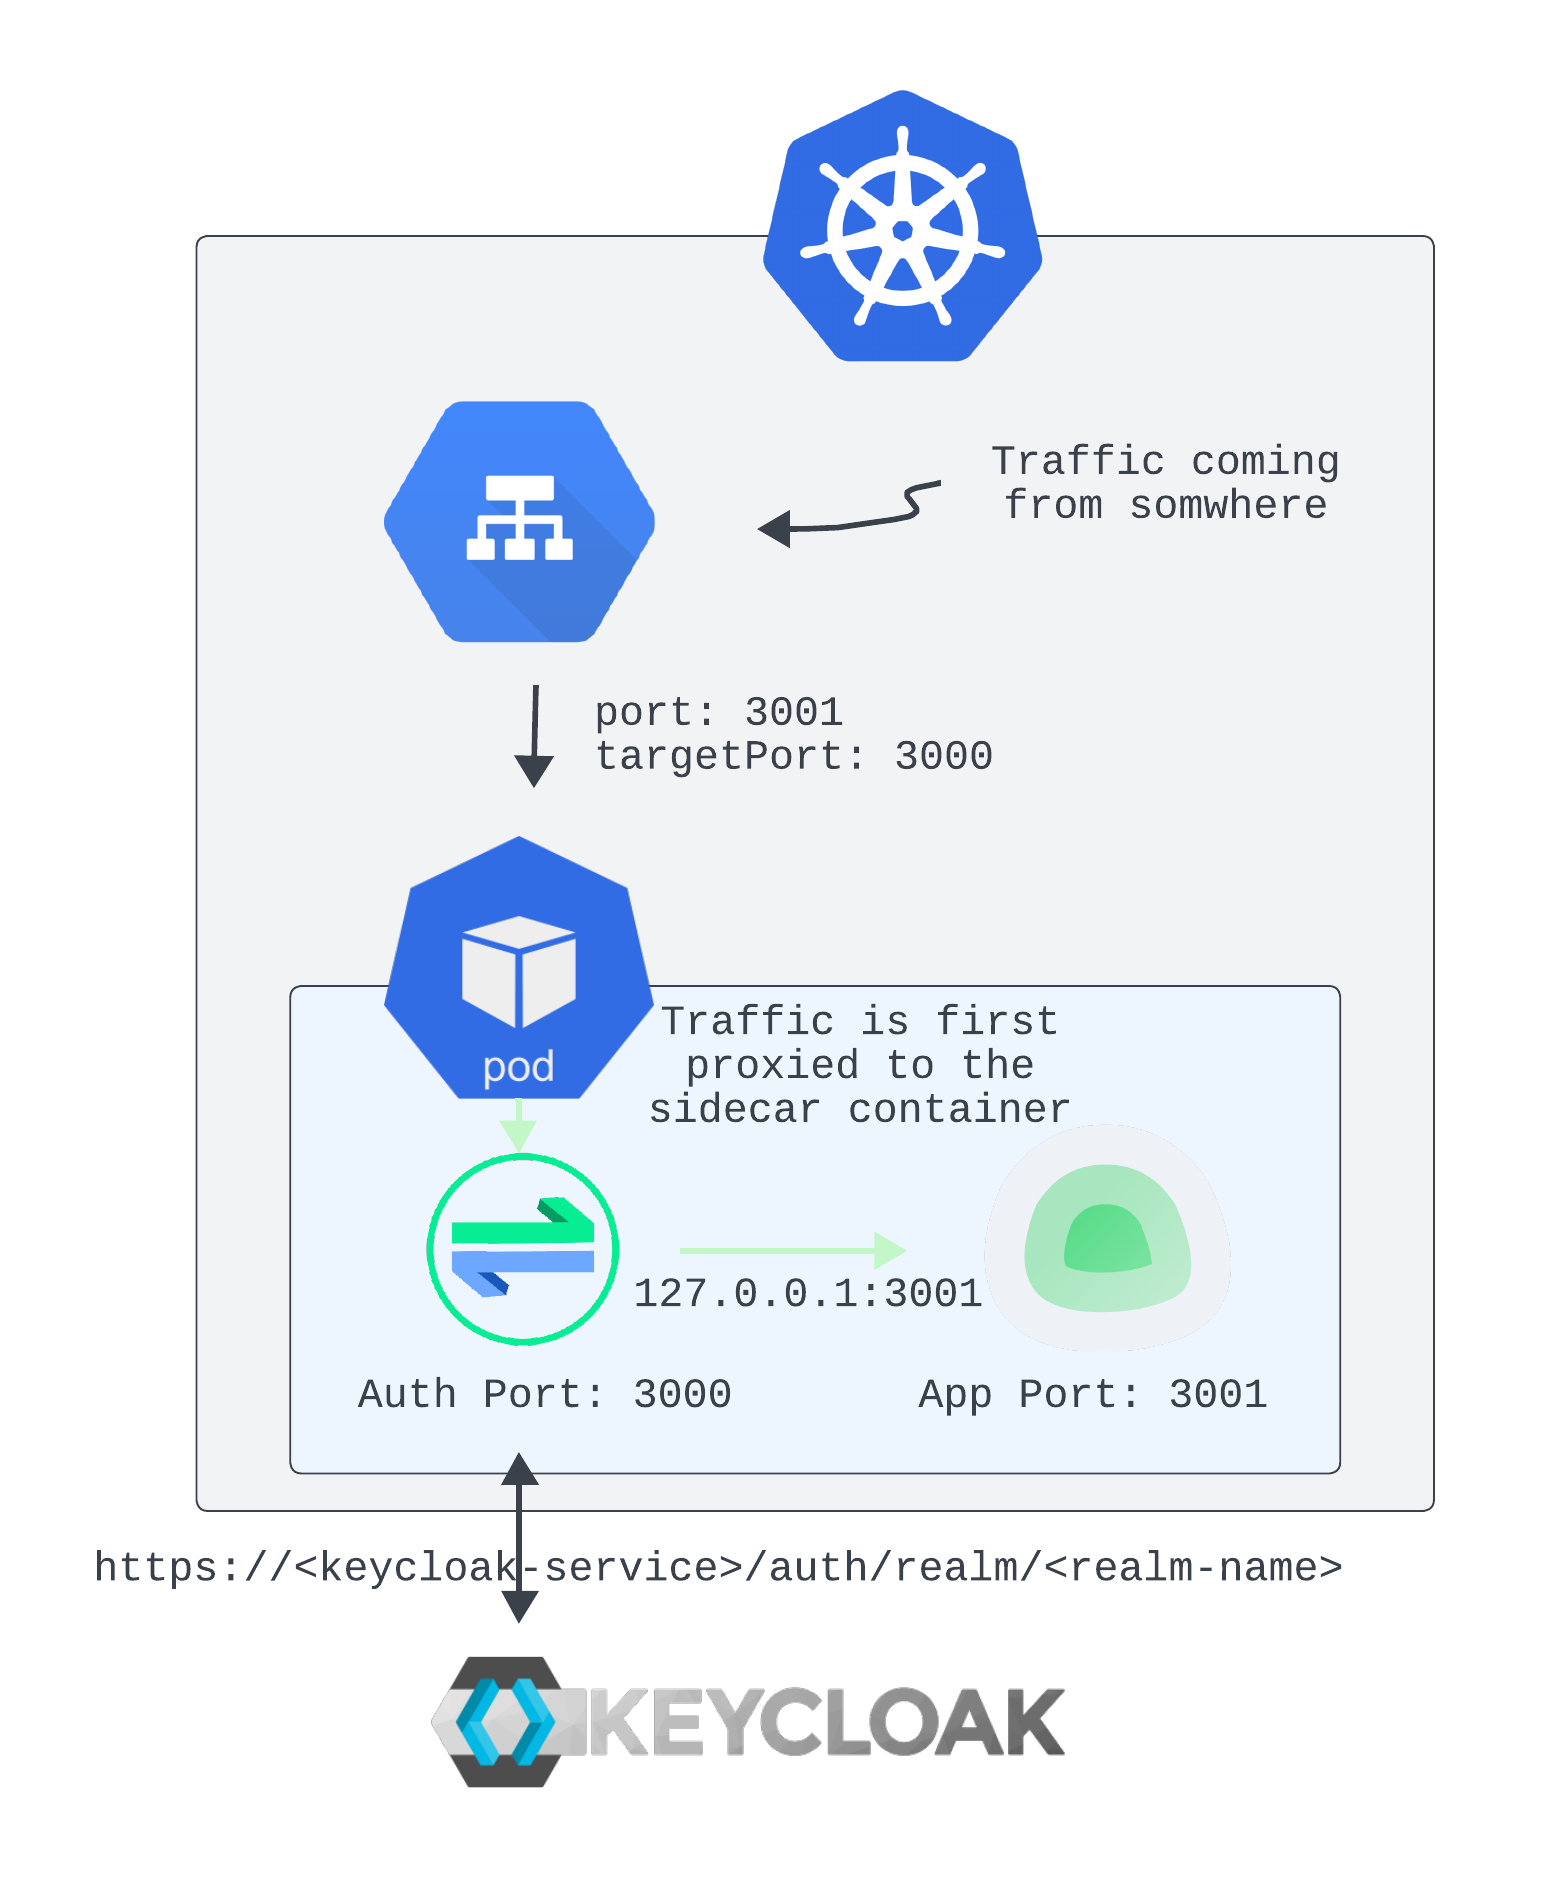
As you’ve seen, no changes are required in the original Helm chart — we’re only patching the deployment to route traffic through the sidecar container, which then forwards authenticated requests to Uptime Kuma.
As a result, any external user trying to access the application will first be redirected to the Keycloak login page.

And that’s it — securing your service UIs really shouldn’t be that hard.
💡 Note: While I haven’t shown the Keycloak configuration, you can set up access control to define who is allowed to access the service. This applies in general — to any application integrated with OAuth2.
⏪ Did you miss the previous issues? I'm sure you wouldn't, but JUST in case:


I hope you find this resource helpful. Keep an eye out for more Cloud updates and developments in next week's newsletter.
Until then, keep 🧑💻-ing!
Warm regards, Teodor